Friday, May 25, 2012

DYNAMIC MRI SCANNING PITUITARY

Dynamic MRI Scanning Technique of Pituitary Gland

In this technique, pre-contrast T1 Coronal and T1 Sagittal  sequences of thin section 3mm through the sella are performed initially. Then, post contrast T1 Coronal and T1 sagittal are repeated. Post contrast T2 Coronal sequence is not a part of standard protocol but is useful for detecting cystic changes and hemorrhage. 

T1 Coronal thin is planned by making the mid scan line coincide the pituitary stalk. Cover the entire sellar and parasellar region.

T1 Sagittal thin is planned in mid T1 Coronal thin section image. The mid scan line runs through the pituitary stalk dividing the pituitary gland into equal halves.

This technique employs rapid sequential imaging to show temporal difference in Gadolinium uptake between adenoma and normal gland. A series of MRI images are taken quickly over several minutes after Gadolinium has been injected. This type of scan is based on the idea that pituitary tumors and normal gland tissue absorb the dye at different speeds. In this way, micro adenomas which enhance shortly after normal gland enhancement can be identified. Macro adenomas can be easily detected on imaging. Micro adenomas are more difficult to detect because of smaller size, appear as a focal area of low signal on non-contrast T1 and also the peak enhancement of the microadenoma occurs after the normal tissue. Almost all pituitary tumors enhance, but so does the normal pituitary gland. In fact, it enhances even more brightly. However, compared to the normal pituitary gland (which enhances quickly), most pituitary adenomas enhance more slowly because of the disorganized microvasculature. We can take advantage of this using a dynamic contrast study, even small pituitary tumors (as small as 1-2 mm) will show up when the MRI images are acquired while the contrast is being injected because the normal pituitary gland will start to enhance before the tumor, thereby showing the tumor more accurately as a dark "shadow" within the brightly enhancing normal pituitary gland.

The T1 weighted image of the normal pituitary gland, stalk and cavernous sinus all increase in signal rapidly following administration of Gadolinium. A pituitary adenoma enhances less intensely than the adjacent normal tissue and appears as a focal hypointense area. A normal pituitary gland will usually look very white on a MRI after the dye has been used. The tumor will appear darker. On MRI, the normal anterior pituitary gland and its stalk return uniform isointensity relative to gray matter. These structures also show intense enhancement after the administration of contrast agent. The gland may be hyperintense in neonates and in pregnant women. The normal posterior pituitary appears bright on T1. The proteinaceous content of neurosecretory vesicles in posterior pituitary partly accounts for its appearance.  

After the bolus injection of Gadolinium (Gadopentetate dimeglumine or Magnevist), 10 sets of images each consisting of three anatomic sections through the pituitary gland were acquired using T1 weighted Turbo Spin Echo sequence of 3 mm slice thickness with no intersection gap. This technique yields an imaging time 16 seconds per set and a total time of 2 minutes 40 seconds. Thenafter, brain survey using T2 Axial Turbo Spin Echo and T1 Axial Spin Echo post contrast can be done.

The enhancement fist occurs in the pituitary stalk, then in the pituitary tuft (the junction point of the stalk and the gland) and finally there is centrifugal opacification of the entire anterior lobe. Within 30-60 seconds, the entire gland shows homogeneous enhancement. The maximum image contrast between the normal pituitary tissue and microadenomas is attained about 30-60 seconds after the bolus. Most microadenomas appear as relatively non-enhancing (dark) lesions within an intensely enhancing pituitary gland. The peak enhancement of the pituitary adenomas occurs at 60-200 seconds, usually after the marked enhancement of the normal pituitary gland and persists for a longer duration. Delayed scan 30-60 minutes after contrast administration may demonstrate a reversal of the image contrast obtained at 30-60 seconds on dynamic scanning. This is because the contrast from the normal pituitary gland fades but diffuses into the microadenomas which stands out as a hyperintense focus. The addition of multiple sequences taken of the pituitary region gives an excellent picture of blood supply to the pituitary. So, the early enhancement of microadenoma long before anterior lobe attributes microadenomas having direct arterial blood supply similar to the posterior pituitary gland.

Reasearch had shown that the average time for on set of enhancement and peak enhancement of normal pituitary gland is 43 and 111 seconds respectively. Likewise, pituitary adenomatous nodules exhibited an average time 105 seconds for onset of enhancement and 188 seconds for peak enhancement. The average time for optimal tumor delineation is 93 seconds.

Please post your valuable comments!
Enhanced by Zemanta

Wednesday, May 23, 2012

MRI Scanning Technique of Thoracic spine

Initially a localizer is taken in three planes.

Then the myelogram is planned in localizer in sagittal and coronal plane. The epicenter of FOV is kept at the posterior border of sixth thoracic vertebra in sagittal localizer and the scan line is kept at the middle of the vertebrae in coronal localizer. In axial localizer, the mid point of the scan line is kept at the posterior border of the vertebra where the line divides the vertebra into right and left equal halves.
T2 sagittal images are obtained. The mid scan line is run through the middle of the spinal cord as seen in myelogram and the parasagittal images are obtained so that the right and left nerve root foramina can be depicted. The scan lines run perpendicular to the vertebra in axial localizer and the epicenter of FOV is kept at the posterior border of sixth thoracic vertebra in sagittal localizer so that the FOV covers from seventh cervical vertebra upto inferior border of first lumbar vertebra. Labelling of the vertebra may be required for relevance.
T1 sagittal images are obtained by copying the scan lines of the T2 sagittal sequence.
T2 STIR sagittal images are also obtained by copying the scan lines of the T2 sagittal sequence.
T2 Axial sequence is planned now. This sequence is planned in mid- T2 sagittal image. The stacks of slices are centered at the intervertebral discs covering the superior and inferior end plates. 1-3 slices are planned in each intervertebral discs from seventh cervical vertebra to first lumbar vertebra. Less slices are chosen where disc bulging and protusion are not seen and more slices are required where there is disc bulging and protusion.
T1 Axial sequence is planned by copying the slice lines of T2 Axial sequence.
T2 Coronal sequence may also be required. The mid scan line is made parallel to the anterior aspect of spinal cord in myelogram and make sure that the whole thoracic spinal cord is included in the scan plan.
The routine MRI sequences for Thoracic spine are:
T1 Sagittal
T2 Sagittal STIR
T2 Axial
T1 Axial
T2 Coronal (optional)
Please post your valuable comments!
Enhanced by Zemanta

MRI Scanning Technique of Elbow Joint

Initially a localizer is taken in three planes.

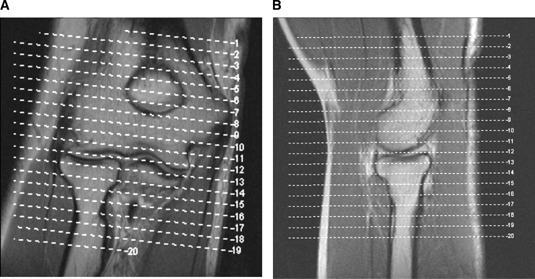
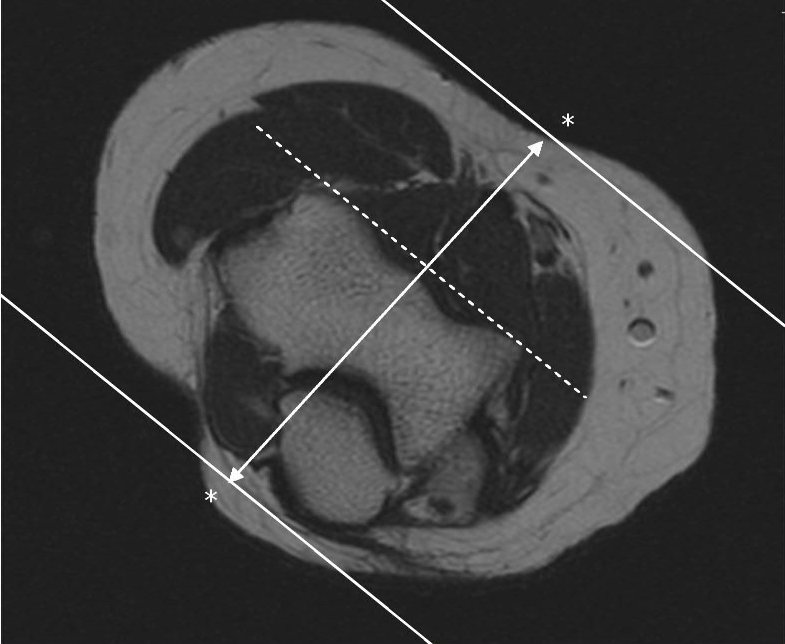
T2 Axial sequence is planned. Use coronal localizer and angle parallel to the elbow joint (parallel to the capitellum and trochlea). Cover from 1 slice distal to radial tuberosity up as far as the slices go (humeral diaphysis).

T1 Axial sequence is planned by copying the slice lines of T2 Axial sequence

.


T2 Coronal sequence is planned now. Use axial localizer to angle parallel to the anterior portions of the capitellum and trochlea (or parallel to humeral epicondyles). Use sagittal localizer to angle parallel to humerus/radius/ulnar plane, but closer to plane of radius if minimally flexed (if markedly flexed elbow, then angle between anterior humerus and the radius).


T2 Coronal STIR sequence is planned by copying the slice lines of T2 Coronal sequence.

T2 Sagittal sequence is planned then, where the slice lines are perpendicular to both axial and coronal sequences. Cover 1 slice outside of both humeral epicondyles.

T2 Sagittal STIR sequence is planned by copying slice lines of T2 Sagittal sequence.


The routine MRI sequences for Elbow Joint are:
T2 Axial
T1 Axial
T2 Coronal
T2 Coronal STIR
T2 Sagittal STIR

Please post your valuable comments!
Enhanced by Zemanta

Tuesday, May 22, 2012

MRI Scanning Technique of Shoulder Joint

Initially a localizer in three plane is taken.


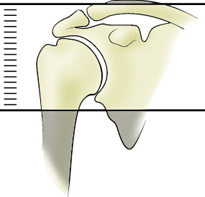
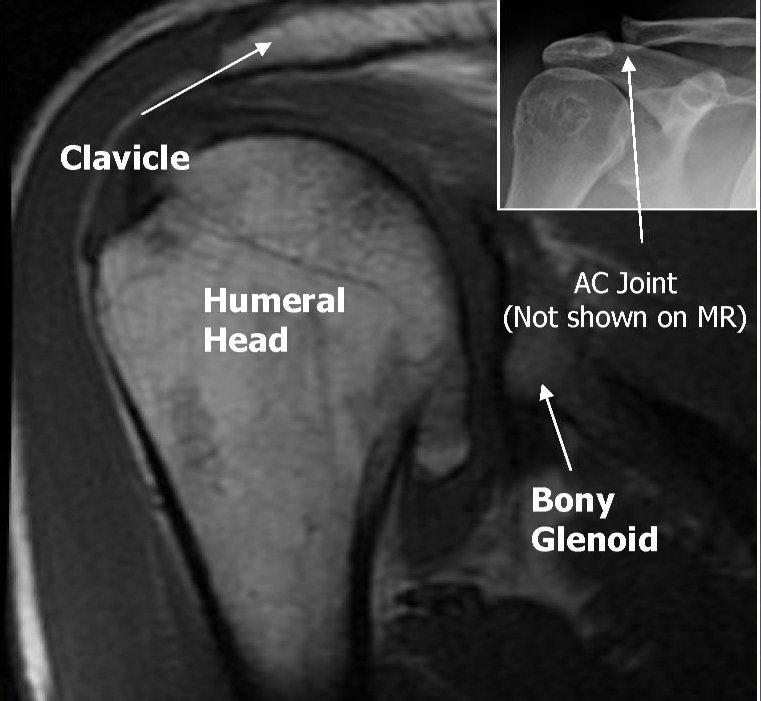
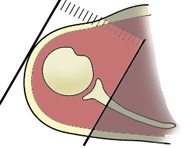
T2 Axial sequence is planned now. Use coronal localizer and the plane is straight horizontal. (If the shoulder is markedly angled, you can angle the axial images perpendicular to the glenohumeral joint). Prescribe plane parallel to humeral shaft. Cover from top of AC joint down and try to cover the inferior portion of glenohumeral joint axillary pouch or the proximal humeral diaphysis.


T1 Axial sequence is planned by copying the slice lines of the T2 Axial sequence.

T2 Coronal sequence is planned now. Use Axial image to orient the plane along the supraspinatus tendon. If the supraspinatus tendon is hard to access, we can also use teres minor or the glenohumeral joint. Cover from anterior portion of coracoid process to one slice posterior to the humeral head.


T2 STIR Coronal sequence is planned by copying the slice lines of T2 Coronal sequence.

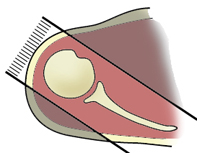
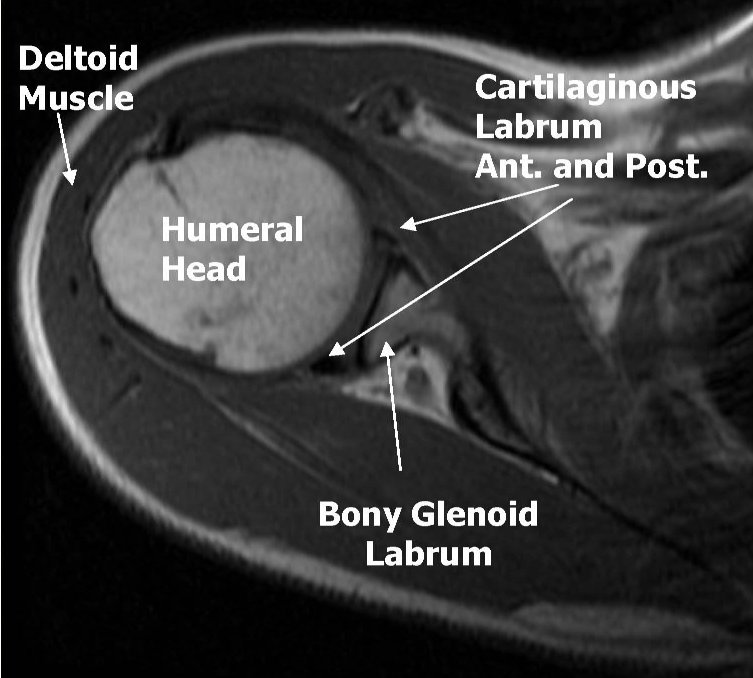
T2 Sagittal sequence is then planned. Angle approximately parallel to the GH joint in T2 Coronal image (Use glenoid articulating surface to angle). Prescribe plane off the axial image with line parallel to bony glenoid. Image from scapular wing to deltoid muscle. Cover from one slice out of humeral head to as far as medial the slices allow (to approximately the medial portion of coracoid process).


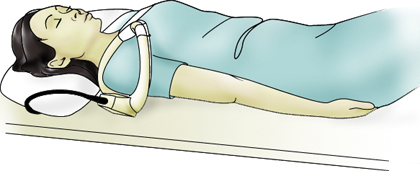
ABduction and External Rotation (ABER) results in oblique axial images along the glenoid. The hand is placed behind the head of the supine patient. The superior portion of the glenoid, near the biceps anchor and supraspinatus tendon are well visualized. It also includes the posterosuperior labrum, the midportions of the anterior and posterior labrium and the junction betweent he supraspinatus and infraspinatus tendons, the anterior inferior portion of the glenoid and the infraspinatus and teres minor tendons.


The routine sequence for MRI Scanning of Shoulder Joint are:
T2 Axial
T1 Axial
T2 Coronal
T2 Sagittal
T2 STIR Coronal

Please post your valuable comments!


MRI Scanning Technique of Wrist Joint

Initially, a localizer image is taken in all three planes.

Then the T2 Axial sequence is planned in the localizer. The epicenter of FOV is set at the center of the axial localizer. Use coronal localizer and angle parallel to the long axis of the wrist (can use radius growth plate to angle). Prescribe plane parallel to distal radius. Scan from proximal metacarpals through distal radius/ulna metaphysis.

T1 Axial sequence is planned by copying the slice lines of T2 Axial sequence.

T2 Coronal sequence is taken then.Use T2 Axial image and angle parallel to anterior radial metaphysis (best fit) at distal radioulnar joint (or approximately parallel to proximal carpal row). Make sure the slices are angled parallel to the carpal retinaculum at the level of hook of hamate. Prescribe plane parallel to line drawn from ulnar styloid through radial styloid. Scan through entire wrist.Use sagittal localizer and angle parallel to radius/lunate/capitate alignment (or just radius if wrist is flexed). Cover through all of the bones and try to cover the flexor and extensor as well.

T2 STIR Coronal sequence is planned by copying the slice lines of T2 Coronal sequence.

T1 Coronal sequence is planned by copying the slice lines of T2 Coronal sequence.

The routine sequence for MRI Scanning of Wrist Joint are:
T2 Axial
T1 Axial
T2 Coronal
T2 STIR Coronal
T1 Coronal


Enhanced by Zemanta

Monday, May 21, 2012

MRI Scanning Technique of Hip Joint

Initially localizer in three plane are taken.
T2 Axial sequence is planned now. Prescribe plane parallel line bisecting lesser trochanters and/or acetabular roofs in coronal localizer. Angle parallel to femoral heads / acetabuli. Scan from iliac crests ( at least 2 slices above acetabuli) through lesser trochanter.

T1 Axial sequence is scanned by copying the slice lines of T2 Axial sequence.

T2 STIR Coronal sequence is planned now. Prescribe plane parallel femoral heads in T2 Axial image. Scan from back of ischial tuberosity through pubic symphysis (at least 2 slices anterior to acetabuli).. Use Axial localizer and angle parallel through femoral heads.


T2 Sagittal sequence is planned in T2 Axial image. Prescribe plane perpendicular to coronal plane. Scan from acetabulum through greater trochanter. Use Coronal image and cover from outer cortex of greater trochanter to the inner portion of acetabulum.

T2 Axial Oblique is more often imaged for femoroacetabular impingement patients and for adductor muscle. Prescribe plane parallel to femoral neck. Scan through entire femoral neck. Use coronal image (with longest medial/inferior femoral neck cortex) and angle parallel through femoral neck. Cover from 1 slice out of acetabulum superiorly through 1 slice out of acetabulum inferiorly. Center at femoral head/neck junction. For adductor muscle, prescribe plane to line paralleling anterior iliac crest. Be sure to scan across pubic symphysis at midline.

The routine MRI sequence for Hip Joint are:
T2 Axial
T1 Axial
T2 STIR Coronal
T2 Sagittal or most preferably T2 Axial Oblique
Magnetic resonance imaging (MRI) of hip joint in Moscow, price and value, magnetic resonance imaging (MRI) of hip joints, magnetic resonance imaging (MRI), hip infant, magnetic resonance imaging (MRI), hip kids, magnetic resonance imaging (MRI), hip infant, magnetic resonance imaging (MRI), the hip joint in coxarthrosis, magnetic resonance imaging (MRI), hip joint arthrosis, magnetic resonance imaging (MRI), hip arthritis
Please post your valuable comments!


Enhanced by Zemanta